Top-Down Mixing With EQ
EQ is one of the most essential tools in any mixer’s toolbox, so it stands to reason that just about every engineer likes to use it in different ways. For example, some producers might love using parallel EQ on everything. On the other hand, others might only use it directly on an insert, and others might prefer a top-down mixing approach when using EQ.
But what is top-down mixing and how does it relate to EQ? More importantly, what’s the point of top-down mixing in the first place and how do you go about doing it? Let’s talk about it!
What is Top-Down Mixing and Top-Down EQ?
Top-down mixing is the process of applying processing to busses, or groups of tracks, before applying processing to individual tracks one at a time. Think about it like shaping the overall vibe of a group of tracks before controlling how each of those individual tracks sound.

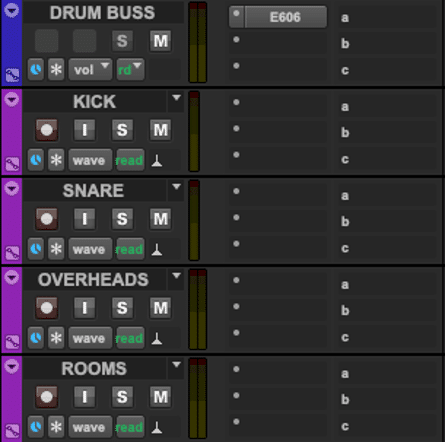
Applying EQ to a Drum Buss before Individual Drum Kit Pieces
Top-down EQ has basically the same definition as top-down mixing, except it pertains specifically to EQ! For example, a producer might use top-down EQ by adding top-end to their drum buss before adding EQ to each drum kit piece one at a time. You could even take it one step further by adding high-end to your mix bus before touching any individual elements.
What is the Point of Top-Down EQ?
Now that you have an idea of what top-down EQ is, you might be wondering why anybody would want to EQ this way. After all, you’re going to end up processing all your production’s elements individually anyway, right? Why not just cut to the chase?
Top-down EQ is particularly useful for when the elements of a specific instrument category (guitars, drums, vocals, etc.) are all lacking, or have too much going on, in a specific frequency range. This same idea could also be applied to your entire mix on your mix buss.
For instance, let’s say your entire mix is particularly dark before you’ve applied any processing to individual elements. Boosting some top end on your master buss might be a good place to start! Similarly, maybe your entire drum kit’s mid-range is too prominent. Before diving into individual drumkit elements, slap an EQ on your drum buss to dial back the mids and see what happens!
What is the Point of Top-Down EQ?
There is one big thing you’ll want to consider before applying broad strokes to your mix with top-down EQ processing: balance. This is important because, if you don’t have a rough idea of what your elements sound like together, how could you possibly know where to start with processing?
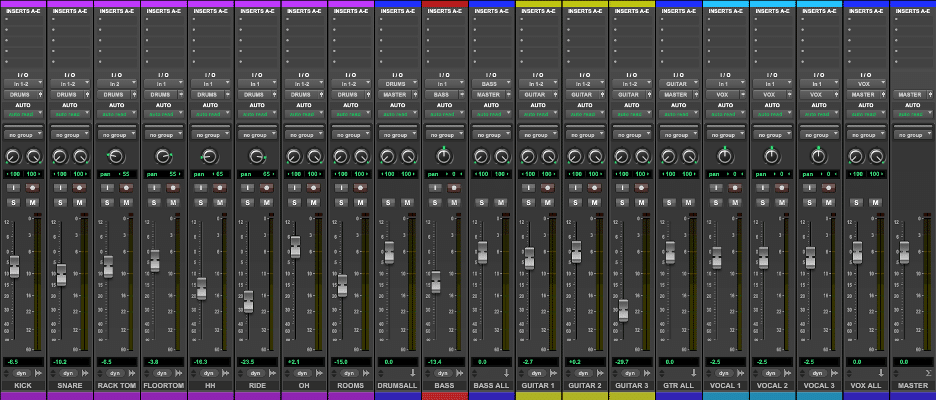
Before applying any kind of EQ, we recommend making sure that you have a rough balance going on with all the elements of your mix. In other words, using only the faders and panning knobs in your DAW and no plug-ins at all, try to get the best mix you possibly can. Don’t worry if it doesn’t sound great by the time you’re done because you’re only getting started!

Mixing Session with Rough Balances and Panning Set
Once you’re done getting a rough balance in place, start making observations starting with your mix buss. How well are the elements of your mix working together? Does everything sound too dark or bright overall? Once you’re done, move onto the busses for each group of instruments. Are your guitars too boomy and low-end heavy? Are your vocals too dark? Make necessary adjustments accordingly and go with your gut!
Once you’re done making broad strokes on your busses, move on to individual tracks.
When You Shouldn’t Use Top-Down EQ
We’ve talked a lot about how to use top-down EQ and why it’s great, but there are some situations where it might not be the best workflow to use.
For instance, let’s say you get your rough mix going and you realize that there is some extremely boomy low-end that is coming from your bass guitar. In this case, you’re most likely not going to want to apply a low-end cut to your mix buss to fix this issue. If you do, you’ll probably end up needing to boost significant amounts of low-end in other elements of your mix to compensate.

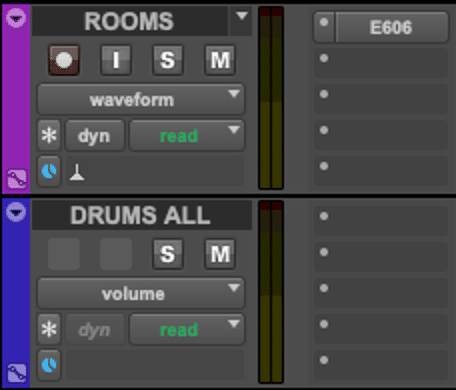
Resolving an Obvious Problem Before Top-Down EQ
Instead, it would make much more sense to tame this low-end issue directly on your bass guitar track before revisiting your top-down EQ workflow. In other words, if there are any blatantly obvious issues with any individual elements of your production, we recommend fixing them before making broad strokes to your production with top-down EQ.
Top-Down EQ with the McDSP 6020 Ultimate EQ
If you feel like you’ve got a good understanding of top-down EQ and how it works, we recommend checking out the McDSP 6020 Ultimate EQ to take it one step even further!

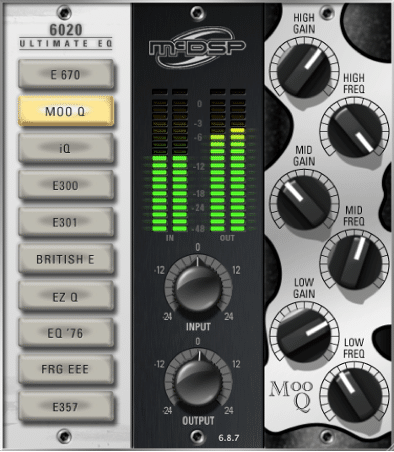
The McDSP 6020 Ultimate EQ Plug-In
The 6020 Ultimate EQ by McDSP features 10 different EQ modules that all bring their own unique sonic characteristics to the table. From smooth tube emulations to aggressive solid-state designs, you can rest assured that the 6020 will have what you need.
The 6020 doesn’t only offer great sound, though. It also offers the perfect workflow for experimentation! Its list of modules on the left side of its interface is in order from least aggressive at the top to most aggressive at the bottom. For example, the E670 module is less aggressive than the iQ module.
Not only that but tweaking parameters and then moving from one module to another causes the parameters you set on your first module to transfer over to the next one. For example, let’s say you start with the E670 module and boost 5 dB at 10 kHz. If you were to switch to the E301 module, your 5 dB at 10 kHz boost will automatically transfer over to the E301.
This makes it incredibly easy to bounce from one EQ to another to develop an understanding of what each one brings to the table.
Want to check out the 6020 for yourself? Try out a free 14-day, fully functional 6020 Ultimate EQ trial here. As always, we hope you learned something new! Be sure to sign up for our newsletter below to stay up to date on all things McDSP. We’ll see you next time!


