Anybody with any music production experience knows that CPU power is finite. However, there are quite a few ways that you can do the processing you need without getting completely stopped by CPU bandwidth limits. Let’s talk about some of them!
Make Deliberate Decisions
The first way to shorten your plug-in chains is to make sure that all your plug-ins are serving a distinct purpose! One of the most common mistakes that beginner producers make is using processing just because they feel like they should. Mistakes include putting compression or EQ on a track without first checking that it’s necessary.
Every time you put a new plug-in on a track ask yourself, “Do I really need this? What problem is it solving?” If you don’t have a good answer to either of those questions, you probably don’t need to use that plug-in on that track!
Use Sends Instead of Inserts
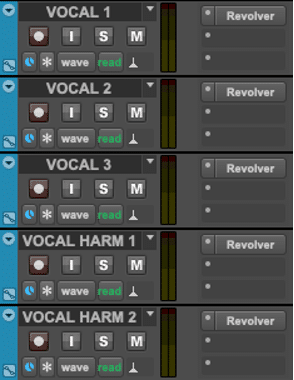
Another very common way to shorten your plug-in chains is by using sends whenever possible. That’s because sends allow you to “send” multiple tracks to a single instance of a plug-in. For example, as shown in the screenshot below, you could route all your vocal tracks to one reverb plug-in instance. This allows you to save CPU resources because now you’ll only have one reverb plug-in instance instead of multiple ones.
Using sends can also streamline your workflow quite a bit. For instance, if want to change the decay time of a reverb that you’ve instantiated multiple times across various tracks, you’ll have to copy and paste the plug-in settings to each track. However, with a send, just make one change to the reverb plug-in on your send track and you’ll be all done!
Saving CPU Power by Using Sends Vs. Using Multiple Plug-In Instances
Note that if you have some special effects that are only going to be applied to one track, then it might not be worth using a send. On the other hand, if you know you want multiple tracks to be run through the same effects, then a send would be perfect so that you don’t need to have too many instances of the same plug-in spread across your session.
Committing, also known as printing, plug-in processing such as special effects is another great way to save CPU power. But what does it mean to commit a track and how does it work?
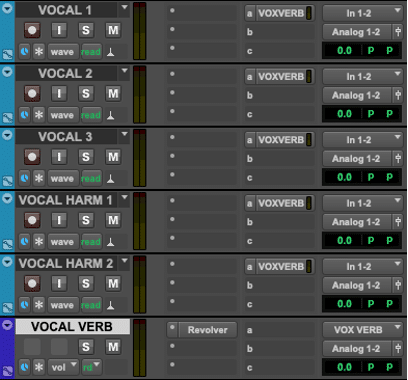
When you commit a track, you’re essentially taking the processing that was being done by the plug-ins on that track and recording it into the audio on the track. For example, let’s say you have a vocal track with a reverb plug-in on it. If you were to commit that track, you would get a new track that has the same vocal performance on it, but the reverb plug-in would no longer be needed. Removing the plug-in will save on CPU power.
If you decide to go this route, remember to save an inactive, or disabled, version of the original track you committed! This way, if you decide to go back and make changes, you don’t have to dial in any plug-ins from scratch. You also won’t lose the original track without any processing on it. To see an example of this in action, check out the screenshot below.
Committing/Printing Reverb on a Vocal to Save CPU Power
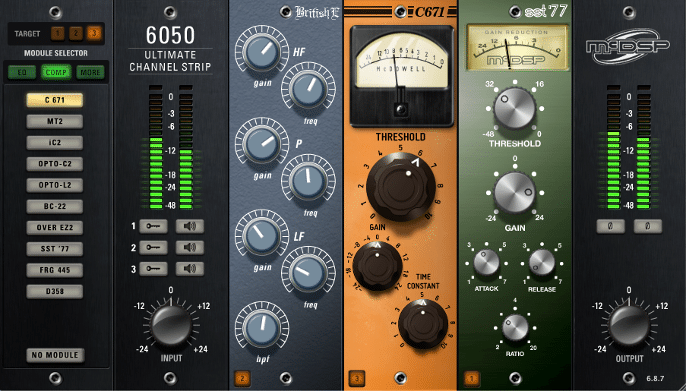
The McDSP 6050 Ultimate Channel Strip Plug-In
Finally, a great way to reduce the number of plug-ins in your plug-in chains to save CPU power is by using channel strip plug-ins! That’s because channel strip plug-ins have various types of processing tools within them. For instance, instead of having one EQ plug-in and one compressor plug-in running side by side, you could have one channel strip plug-in with both EQ and compression built in!
A Unique and Complex Compressor Routing Scheme
The 6050 by McDSP boasts a selection of over 25 modules for EQ, compression, saturation, gating, expansion, and specialized filters. You can use up to three modules in one instance of the plug-in, the order of the modules can be easily modified, and settings are preserved when switching from module to module. That means if you dial in some EQ settings and then switch from one EQ module to another, whatever settings you dialed in will transfer to the next module. This feature easily allows you to just audition the different characters of the modules!
You can even use the module list on the left side of the plug-in’s interface to audition how one module will sound compared to another, as more aggressive modules are towards the bottom and less aggressive ones are towards the top. Not only does the 6050 sound great on whatever you throw at it, but it’s also incredibly easy to use and experiment with!
As always, we hope you learned something new! Be sure to sign up for our newsletter below to stay up to date on all things McDSP. We’ll see you next time!